Audio that sounds good is a critical element for a promotional video to be taken seriously.
If the speaker recorded on the video cannot be heard clearly due to too much background noise, viewers will give up and stop watching your video. There are far too many alternatives available for the viewer, and their time will be better spent selecting one of them.
Good audio begins with how it is captured, which is done using a microphone.
The Microphone
A microphone is an audio-to-digital listening device that takes sound from the environment we hear, and translates that sound wave into a digital form that can be recorded onto a recording device. Microphones come in all sizes, from miniature pinhead size all the way up to the size of an American football.
All video cameras, aside from the most high-end ones, which rely entirely on external audio recording options, come with built in microphones. These built in microphones are primarily for convenience – they’re simply ‘all-around’ microphones that will be suitable if an external microphone is not available.
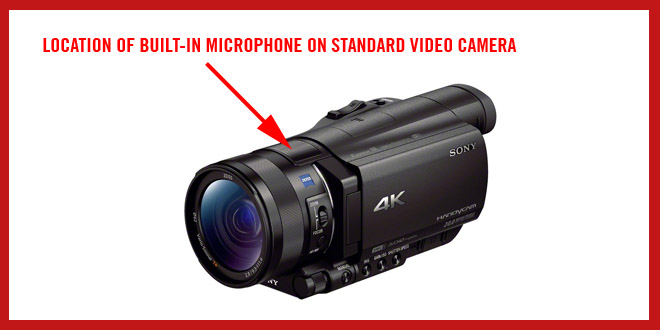
The Downsides of the Standard Built-in Microphone
The unfortunate truth of using a built-in omnidirectional microphone is that all background noise is picked up and distracts the listener. This background noise is entirely unprofessional for a professional-level video.
All video cameras’ built-in microphones – from a DSLR camera, to a Sony Handycam-style camera to an iPhone – are general all-purpose microphones designed to pick up and ‘hear’ absolutely everything in an environment. These are useful if you want to capture the sound of a busy street or hum of an office, but it will not work well to hear a particular person’s voice, which is our primary focus when filming promotional videos.
Thankfully, a variety of dedicated microphones exist, built for specific purposes. In most cases, for a promotional video to be a success, the goal is to specifically hear only the vocal sound range of the human voice and to ignore just about everything else. An external dedicated microphone will do a rather good job of filtering out the background sounds of shoes shuffling, the hum of equipment, and the whistle of the wind and background chatter. These dedicated, purpose-built microphones make an astonishing difference in sound quality!
Of the multitude of microphones available, there are two types I suggest for professional level video production.
Miniature ‘Clip-On’ Lavalier Microphone
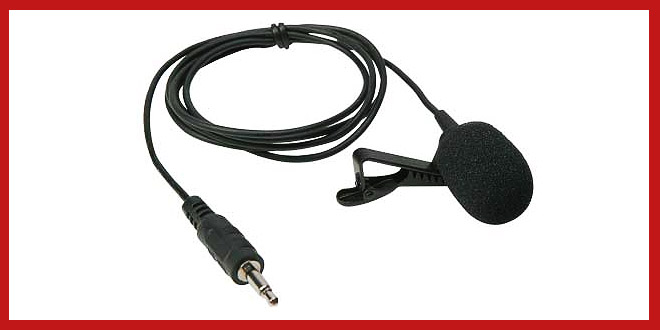
A lavalier microphone, or “clip-on mic”, is attached to the person who is presenting on camera or being interviewed, to record their voice.
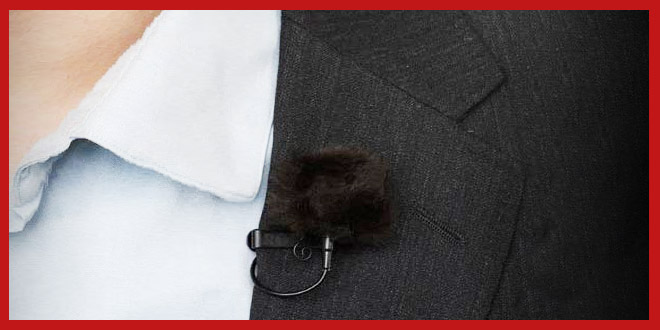
The lavalier microphone, or “lav” for short, is very small, about the size of a tip of a person’s finger, and has a clip for attaching to a person’s clothing on their chest, such as a shirt flap, tie or lapel. This keeps the microphone proximity close to the person’s mouth in order to ‘hear’ what is being said easily. A lavalier microphone is often the best option for a small video production, and simply requires minimal prior setup, providing you have time to spend with the subject on camera.
When watching professional video interviews, it is not uncommon to actually see the a bit of the small lavalier microphone recorded on camera. Next time you watch a CNN or BBC news segment, watch for the lavalier microphone! So rest assured, it is professionally accepted if it is seen, though most try to avoid it if possible.
From the microphone, a small wire lead is tucked into the clothing that leads to a long wire to the camera itself, or if it’s a wireless version, the wire leads down to a unit on the subject that transmits the audio to a second unit by the camera. A wireless version is far more expensive, but reduces the risk of tripping on the wire and pulling over the camera! Wired versions reduce the risk of audio interference from other wireless frequencies, which can sometimes occur with wireless audio gear.
At the end of the wire, lavalier microphone often has the standard 3.5mm connector on the end to plug into a camera or audio recorder. If you’re recording straight into a basic DSLR video camera or entry-level 4K video camera, you will likely just be able to easily plug directly into the camera itself, no adapter required. If you’re feeding the audio to a dedicated audio recorder, such as a Zoom H4N, or a professional-level video camera such as a very high end Sony PXW-FS7 Super 35, you’ll likely need an adapter to convert the wire from a 3.5mm headphone to a professional-style XLR connector. With an XLR to 1/8” adapter, it is an easy conversion.
Similar to the XLR adapter, if you’re recording to a mobile smart device, such as an iPhone, tablet or a Android phone you will need a special 3.5mm adapter jack for the connector, or will need to purchase a special lavalier microphone. This is because the 3.5mm input jack on iPhones and other mobile devices is proprietary. These adapters are inexpensive.
![]() Suggested Lavalier Microphone: A wired lavalier microphone is good to start with. The lavalier microphone I suggest due to its high amount of very positive ratings is the Polsen OLM-10 Omnidirectional Lavalier Microphone. It works well, and is relatively inexpensive – see the other reviews other buyers have shared!
Suggested Lavalier Microphone: A wired lavalier microphone is good to start with. The lavalier microphone I suggest due to its high amount of very positive ratings is the Polsen OLM-10 Omnidirectional Lavalier Microphone. It works well, and is relatively inexpensive – see the other reviews other buyers have shared!
The ‘Shot Gun Style’ Directional Microphone
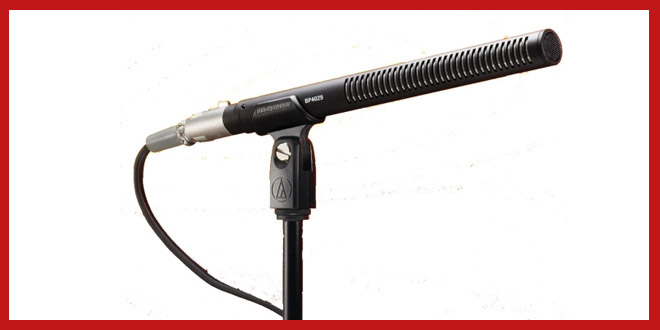
The other great microphone option is a directional ‘shotgun' microphone. When aiming the tip of a microphone directly at a sound source, it will pickup that sound, and essentially try to eliminate all sound from any other direction!
They work well in noisier environments – when either the microphone is attached to the camera and as long as the camera is pointed at the subject. However, most of the time, it works best to have the shotgun microphone far closer to the subject, out of view of the camera, in order to get the best sound.
These microphones can be more work – constant monitoring, or listening to the sound as it’s recorded, is required. In addition, while sounds more than a few degrees off center from the microphone are somewhat filtered out, and sound more muted and quiet, it will still pick up background noise to some degree.
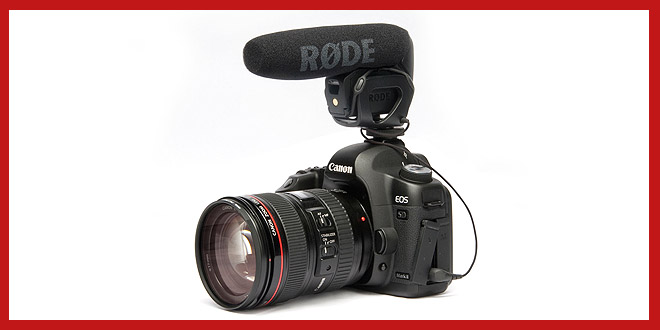
![]() Suggested Shotgun Style Microphone: For a DSLR top-mounted Shotgun microphone, I recommend the very popular Rode VideoMic Pro – it’s rated extremely highly and is worth the money. For a more traditional stick-style shotgun microphone, the AudioTechnia Condenser mic is a worthwhile option and will likely offer more flexibility, though it has an XLR cable connector so you may require an adapter.
Suggested Shotgun Style Microphone: For a DSLR top-mounted Shotgun microphone, I recommend the very popular Rode VideoMic Pro – it’s rated extremely highly and is worth the money. For a more traditional stick-style shotgun microphone, the AudioTechnia Condenser mic is a worthwhile option and will likely offer more flexibility, though it has an XLR cable connector so you may require an adapter.
Using a Microphone with an iPhone, Tablet or similar Mobile Device
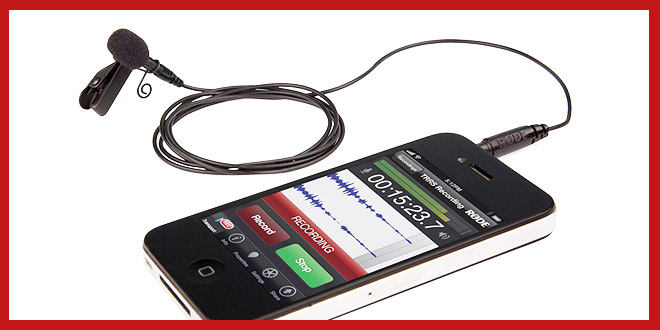
The microphone (or ‘mic’, pronounced “mike”) on the iPhone is located beside the 3.5mm headphone port – the microphone is a nondescript small hole. Be certain that the microphone hole isn’t covered by a custom case or covered by a finger, as this would muffle the audio. Always play back a sample video clip to test the audio before you commence filming a lot of video.
A dedicated microphone is a worthwhile investment for any level of video producer. I highly recommend that you choose to plug in an external iPhone microphone to record suitable more-professional audio. As mentioned above, most non-iPhone specific microphones will work with the iPhone but will first require an adapter to properly work.
Another option is a shotgun style microphone that fits right into the iPhone and is best suited for on-the-go video filming, with a variety of persons being interviewed. No setup is required with the person who will be on camera. The microphone simply plugs into the iPhone, and then you keep the microphone aimed towards the face of the on camera speaker.
![]() Suggested Smartphone Microphones: A smartphone-specific (no adapter needed) lavalier microphone option for a smart phone is the Rode SmartLav+ – just plug it in, and you are ready to record! To use any other standard microphone, an adapter is required because the 3.5mm headphone jack in the iPhone is proprietary and not quite universal – you will need a 3.5mm wireless adapter to connect a standard audio plug to the iPhone.
Suggested Smartphone Microphones: A smartphone-specific (no adapter needed) lavalier microphone option for a smart phone is the Rode SmartLav+ – just plug it in, and you are ready to record! To use any other standard microphone, an adapter is required because the 3.5mm headphone jack in the iPhone is proprietary and not quite universal – you will need a 3.5mm wireless adapter to connect a standard audio plug to the iPhone.
Which to Buy: Lavalier Microphone vs. Shotgun Microphone
Owning each a lavalier microphone as well as a shotgun microphone would be ideal for anyone!
However, for a beginner producer with a limited budget who plans to film in a closed studio, I recommend opting first for a lavalier as a dedicated microphone. It will isolate the best vocal sound by blocking the majority of background noise, and produce a more professional promotional video.
If you are instead planning on filming on the move and filming outside with quick interviews in the field, a shot gun style microphone will likely be your best bet. The shotgun microphone – especially one mounted to the camera itself, is easy for a small-team to move around as it requires no setup and will offer far better results than the built-in microphone.
The video production stage is where all your work culminates into a presentation that will yield results!



[…] More here: Choosing The Right Microphone: The Best Mic for Video Production Success […]
[…] Of course, you can also invest more and get other less “invasive” mics that create even better quality audio and don’t need as much fiddling with to get best placement. (And then there are other much more accessible options to you as well.) Wistia has a helpful roundup of different mics you might like to try for your next shoot, as does Reel Designer here! […]