It's crunch time. You need a decent promotional video for your organization and as quickly as possible.
But, you don't have a lot of money set aside (and you've heard video is typically expensive). Also, you might not exactly be confident as to which camera gear you need to get started. It is likely that you have heard you need a Canon video camera or a DSLR camera, as well a computer powerful enough and with enough memory storage to edit. And it has to have the right video editing software.
But then you just have to hope that all this gear works together, which is worrisome, since you need this video up and online quickly!
Still, you have to learn how to each separate piece: use the camera, the computer software, and the ins-and-outs of promotional video production.
Yikes.
Learning how to use a video camera as well as editing software seems like a lot of time and effort.
But the video must be inexpensive to make, be filmed and edited and online quickly, and it's got to look decent otherwise there is no point in doing it.
And it has to be good. And it has to be got to be done quickly. And still be inexpensive.
Be good, inexpensive and be done quickly.
Can it be done?
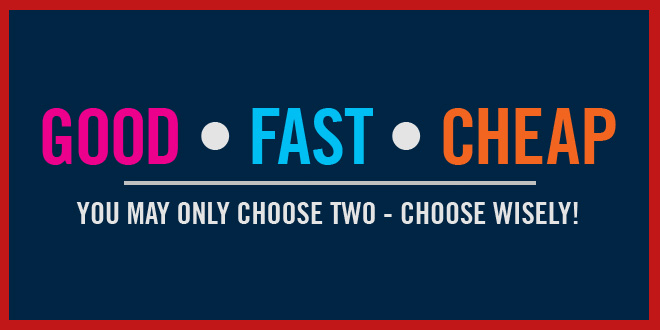
Good. Fast. Cheap
Yes it can be done – and here is why:
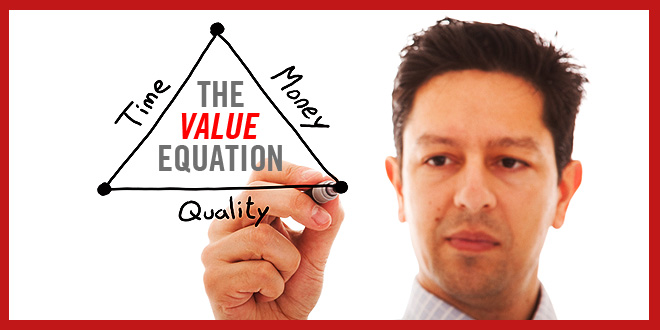
Creative professionals – designers, copywriters, photographers and videographers will often have three requests:
- I need the project to be done quickly
- I need the project to be really high quality
- Oh, and I need this to be done as cheaply as possible
The value equation – money vs. quality + time. However, this does not compute!
The creative professional will then say, “Sure, pick any two options and I can make that request happen.”
Which metric trumps the rest? Quality? Speed? or Price?
The implication is – and justifiably so – that it is not possible to have a project that contains all three qualities.
Which brings us to DIY (do it yourself).
The Golden Ticket: DIY (Do it Yourself)
Sure, due to the inherent time associated with learning, DIY is slower than hiring an experienced professional to create a promotional video for you, but the benefits should be obvious: you are in control of the speed of your learning and creation (the faster you apply yourself to learning, the closer you are to completion). Secondarily, once you have learnt the skill of promotional video production, you are well on track to create unlimited future promotional videos!

Even if you eventually hire out a professional to create promotional videos for you down the road, by learning the basics you will have the skills, comprehension and experience to be able to better guide the process and get the product you want.
After all a professional ought to learn the communication process in order to maximize success!
The Top 5 Cheap Gear Must-Haves to make your very first Promotional Video
Without wasting anymore time, here is the cheapest gear list – which I feel I can personally recommend – that you money can buy that will still enable you to film your own promotional video in high definition!
It works. How do I know? I either own all of this gear, or have used it in the past when I began my video production journey.
It’s not a fancy list, but rather an honest. Besides, for under $400 US, you will have everything you need to look and sound reasonably decent on screen in your own promotional video. Gear-wise at least.
Yes, believe this video gear will work. Read on to see how and why:
Number 1: Buy a (Decent) Tripod
There is no point in even attempting to try and create a promotional video that your audience will take seriously without a tripod. Don’t borrow a tripod. Don’t prop your camera on a bunch of books and hope it works. Get a tripod. You can go to your local camera store, or to a drug store, or whatever, but make sure you own a tripod to hold your camera up.
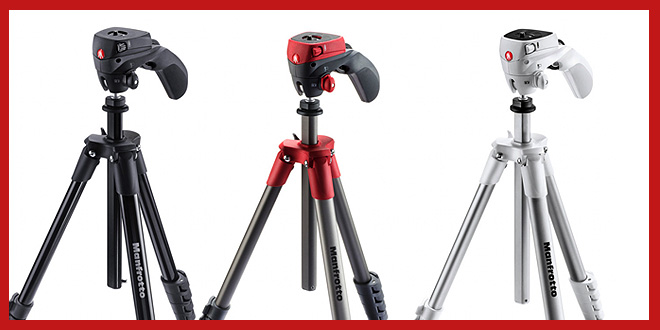
Tripods range in price and ability – if this is your very first video, why not buy the cheapest one. Why? Something to put your camera on. Besides, if you go for the cheapest tripod of all (warning: here is my sinister intention) you will truly appreciate what goes into a ‘real’ tripod next time around! (This ‘trial-and-error approach' is how I myself learnt this lesson – ask me which is the only brand I buy now (hint: it starts with the letter ‘m’).
Suggested Tripod Option: $70 Manfrotto Compact Action Tripod. It may be a bit pricier than a drug-store variety tripod that you might have seen, but at $70 US dollars, it will perform well and you will use it for years. I found this compact tripod is just that – compact, but it holds steady, pans, tilts, and elevates like the rest of them – up to 5 feet (as it’s a compact version). I am pleasantly happy with how well it pans and tilts – the system is simple, but it actually works, thanks for the high quality Italian engineering! Place this on a table, and the inexpensive professional tripod will offer plenty height.
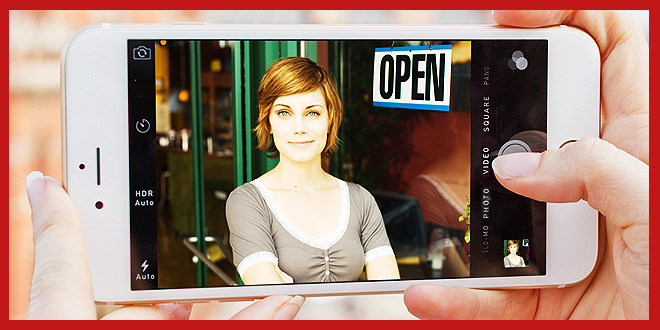
Number 2: Buy an iPod Touch or iPad (32GB)
Editor's Note: Since this article was first published, the iPhone 6S has been released – and it films video in glorious, stunning 4K video resolution. As a follow up to this article, I suggest you also read: 4 Huge Reasons why 4K Video on iPhone 6S is Great for DIY Marketers
Apple iOS handheld devices are dream machines. They are powerful miniature computers and do it all – video camera and are fully capable of video editing and online delivery. The iPod Touch or iPad each sport a sharp full 1080P high definition video camera, audio recorder, and video and audio editing workstation – all in one! Or if you have an existing iOS device, such as an iPhone (4S model or newer) – you’re already capable here and can save the cash – (though having a dedicated camera/editing device has its benefits.)

It’s truly incredible what power is available in these small handheld devices.
In addition to the high definition video lenses, iOS devices have microphones and the power to edit the HD video – right on the device – and upload to the Internet. I created a series of 19 HD videos on my iPod Touch while traveling through India – shooting, editing and uploading to YouTube all wirelessly, never once plugging into a laptop.
Actual Hollywood-style films and TV commercials have been actually been filmed on iPhones – and no one was the wiser. The quality holds up, and to the learning curve is simple, which shortens the time to learn video production.
DSLR ‘photography' cameras or handycam-style video cameras require a far steeper learning curve to master how to film professional-style videos. Then the footage will need to be copied over to a computer – which is hopefully fast enough, and with enough memory storage to hold the files. Then video-editing software has to be learnt to be able to edit together the video – and then time needs to be spent actually editing.
Many more steps, which equates more time, and more money. Mixing and matching different cameras, software and computers presents unknowns and the chance for missteps. And if you have a deadline you need to be meet, this is an opportunity for disaster.
The all-in-one nature of the iOS environment is that the footage enters the iPod when it’s shot through the lens, is edited on the device, and then leaves when it’s entirely made into a video – no extra steps required!
Suggested iOS Device: A iPod Touch 32GB $250 or a iPad Mini 32GB $350- they are both great, I own both. Important Note: Make sure the device you choose comes 32GB memory – you cannot upgrade it later. iPod Touches will typically be easier to mount to a tripod, but the iPad would be easier to work on, as its screen is larger. You need to purchase a device with a minimum of 32GB – an entry-level 16GB won’t be enough. A 32GB iPod is less expensive than a 32GB iPad, but both are similar in speed and computing power.
(Note: You will need a mobile phone tripod mount or a tablet tripod mount – these mounts attach to device and then to the tripod.)
Number 3: Buy the iMovie video-editing app
The iPod, iPad and iPhone all have a simple-yet-powerful built in video camera app. You can record all the video you want easily, but to begin editing you need a video-editing app.
There are plenty available from various different software companies, but I recommend the one that Apple built and sells with their own devices in mind – the iMovie app for iOS. iMovie is very inexpensive at approximately $6 US dollars, and it's full featured, easy to use, and delivers a high-quality video end product.

Buy iMovie and you’ll not need any more software to pump out your promotional video! The learning curve is simple – the app has it’s own built in tutorial, and has a full-featured help feature as well. You cannot go wrong here.
Suggestion Editing App: Purchase $7 iMovie for iOS. Do it, for yourself.
Number 4: Buy a Clip-On (Lavalier) Microphone
Good looking video quality is one thing – being able to clearly see the subject. But what sets a truly professional video apart from amateur video is sound. Quality sound. If a video's dialogue that cannot be heard easily, viewers invariably will close the video, never to watch it again.
Why not?
There are so many other videos online with decent and clear sound – why waste time trying to decipher poor sounding audio? It's too much effort to listen too, especially when easier options are available.
Decent sound is a non-negotiable. While all iOS devices do have microphones, these microphones are general ‘omni-directional’ variety. This type will pick up all the sound it can hear nearby – including background traffic, creaking chairs, murmuring conversations and humming air-conditioning units. Hardly professional.
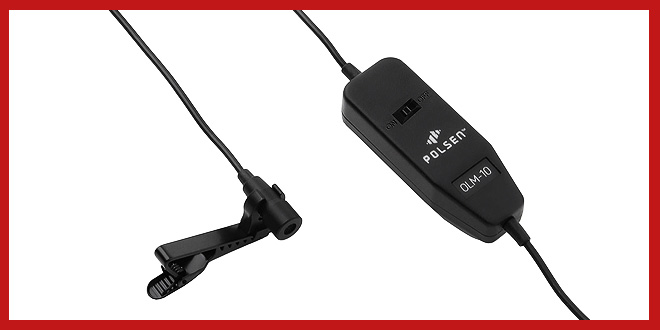
A lavalier microphone is a miniature clip-on microphone that clips on to a person's shirt collar or lapel and the wire leads back to and is plugged into the camera or audio recorder.
Lavalier mic's are the simplest solution to offer professional recorded dialogue. Plug the microphone in, test the setup by recording a few versions and play back and listen to how loud or soft the audio is. Once satisfied, then proceed to record your promotional video!
Suggestion for Microphone: I have a proven suggestion – a Polsen lavalier microphone at only $22 – it will make all the difference compared to just using the built-in mic. The Polsen Omnidirectional Lavalier Microphone is inexpensive, fits into an iPhone, extremely popular and works very well!
Note: If you use a different mic instead for your iOS device, you need an adapter. There is a specific type of jack on iOS devices for audio recording – or be certain you purchase a lavier microphone designed for the iPhone or iOS devices, like the Polsen mic above. If you need an adapter for a regular microphone to use with your iOS (or Android) device, they exist. Personally, I want the option of using any audio gear, so I purchased the ALM Mic Adapter for myself to do this.
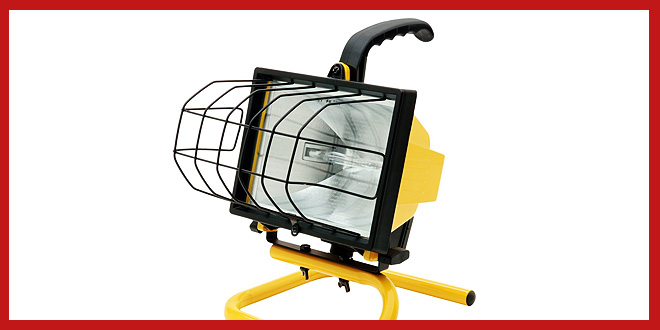
Number 5: Buy a (few) Cheap 500-watt Work-lights
Lighting is the final piece of gear I’m recommending, and, this suggestion is the cheapest (and least professional) of the bunch. Mind you, this is the talking about lighting on my ‘cheap’ list right, not the ‘hundreds-of-dollars-low-end-professional-film-light’ on a middle of the road list.
I am being frank and honest with you, these work.
I film with video-specific lights, but years ago when I started as merely as a hobbyist filmmaker, I used these yellow 500-watt work lights used on a construction sites for filmmaking. Sure, work lights are very hot to handle, difficult to aim, are generally often a nuisance. So, why did I use them? Because they are very cheap, and throw off a lot of light – 500-watts per light! While very basic, they do their job, they make light.
The solution to controlling (aiming) the light is to use a while cardboard reflector, or some sort of white-colored panel (careful: don’t get it too close to the light or it will start smoking and perhaps burn) and bounce the light onto your subject. There is an art to this, and you will definitely will have to try out a few variations.
While these lights are not pretty looking, they will work if you are making your first promotional video for yourself. These work lights are somewhat passable stand ins while you save up for the real thing!
Suggestion for Cheap Light: Portable 500W Table Work Light can be purchased for $18 online – they are truly inexpensive. I recommend to buy at least 3, and then you can try out the standard video filming 3 point lighting setup as each light will match.
Short and Sweet… and Cheap!
There you have it. A short but sweet list of cheap gear you can purchase to create promotional videos! If you have any suggestions or tweaks.
Add your ideas to the comments below: