So you' ve got the ultimate all-in-one production studio in your hand, the legendary iPhone.
And yo've heard you can do video with it. Really good, high resolution video. Awesome!
Now what? How do you avoid having your video look like it was shot by a toddler on a sugar high?
Simple actually. Without spending a dime more on your smartphone camera setup, just be sure to follow these 5 effective steps to record successful video on your iPhone:
1. Short ‘n Sweet.
Shorter is nearly always better with video.
If you can fully convey an idea or experience in 10 seconds, it’s always better than taking 30 seconds. 10 seconds to 30 seconds is best for short video clips.

Yes, that short! Views drop off after this because viewing attention spans are short in the modern online world.
Keep it snappy!
2. Hold it Horizontal.
Hold the iPod Touch flat, not upright like a cell phone when recording video. Always avoid VVS (vertical video syndrome). Remember: the final video will be likely viewed on computer monitors that are always horizontal (landscape).

*PRO TIP: Never save or bother to edit a video clip that has been improperly recorded by holding the iPod Touch upright – this is entirely unprofessional, inconsistent and detracts from the brand. Delete an incorrectly recorded clip and try again.
3. Steady As She Goes.
Even the smallest of movements are magnified when video is played back.
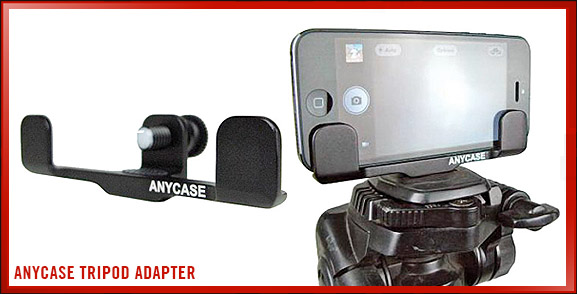
While you certainly can handhold an iPod Touch or iPhone when shooting short video clips, be aware that bumps, jerks and shakes are difficult to watch. In fact, movement that isn’t smooth is so unbearable that often people will close a video if they occur. Be sure to hold the device with both hands supporting from the bottom, or if possible use a mini-stand or tripod.
4. Shh… Ensure it’s Quiet.
Background noise can easily overwhelm the sound of a person’s voice if they’re trying to speak to the camera. If you can, record the video in a quiet place (shoot a test video to ensure no fridge humming, traffic/plane noise, background conversations, loud music, etc.) – extra sound is noise, and distracting.

Of course, if you’re shooting a video clip with no one talking and just trying to capture the ambience, then of course, go right ahead and ignore this point!
*PRO TIP: Don’t fret – it’s hard to be perfect – just try your best in the given situation!
5. Be Aware of Light.
Avoid over-exposed backlighting (when the sun or light is behind the subject) which makes the camera unsure what contrast levels to use and ends up making the subject a black silhouette (see example below).

It is possible to ‘set’ the iPod Touch to know which part of the image to exposure for by touching the screen and holding that area for 3 seconds!
Easiest solution to avoid making the person a black silhouette – shoot the video with your source lit nicely!
Apple offers the following chart (based on 60-second shooting times) for its other video options:
- A minute of 720p at 30FPS takes up 60MB
- 1080p at 30FPS takes up 130MB (this is the default setting for the iPhone)
- 1080p at 60FPS takes up 200MB
And, for fun, here's the space cost for one minute of slo-mo:
- Filming 720p at 240FPS takes up 300MB (default)
- Filming 1080p at 120FPS takes up 375MB


I have found this website only today and I am here already 2 hours:-) Again excellent post with superb tips! I wish this post will be found by many “video lovers” posting their crappy iPhone videos on yotube:-) Thank you for sharing this Chris, the site is realy great source of information.